Prusa Mini XZ Support

Description
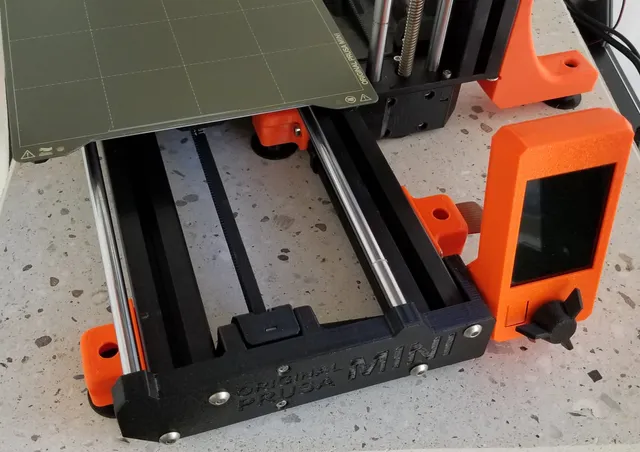
PDFFor those of you with the X axis that is WAY OFF here is something to fix that. I printed many parts on my Mini but noticed some striping on taller parts. So when I got Octoprint setup and ran Bed Visualizer it was pretty obvious what the issue was. My X axis was over 2mm off from one side to the other.
I tried the Prusa MINI Z-Axis Support Brace which helped make the vertical arm more rigid but it didn't help with how far the X axis was off. This adds an adjustable leg that extends out from the vertical arm. The screw has a slot on the top that can be accessed through the support. Just turn the screw and adjust till the X axis is level.
If you don't know if you have this issue just take a look under the electronics box from the front. It was noticeable on mine that it wasn't level.
Attach to the 3030 aluminium extrusions using two M5 x 12 mm hexagon head cap screws and T nuts.
See attached Figure for what this tries to fix:
Extrusion A is used to connect the Z axis arm C. The Z axis arm is off center from the Connection point on A and has a decent amount of weight. This causes it to sag at point B. This in turn causes a change where Z axis is no longer 90deg from point A. This angle offset will translate into a difference between Z1 and Z2 between the extruder and build plate.

Print instructions
I printed everything at 0.2 layer height with 3 perimeters.
I added a V3 that changes the location of the cutout to better go around the lower screw. I noticed it wasn't perfect when printing a second one.
I wanted the screw to be tight so it wouldn't move. For that one you may need some wax to get it to twist in smooth. I also included one that is loose and goes in easy for those of you that don't want the tight fit.
Tags
Model origin
The author hasn't provided the model origin yet.