Sanding Stick - Metal-working
Description
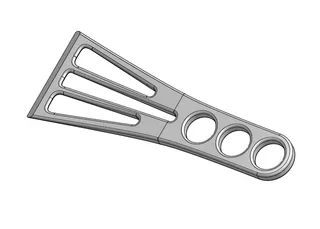
PDFI have called this a sanding stick for lack of a better name, but it is actually meant to hold abrasive cloth strips ("emery cloth") typically used for metal working. This holder is sized for the type of abrasive cloth strips sold in rolls 25mm wide (note these are continuous cloth strips - not circular belts).
The holder works by wrapping a cloth strip of appropriate length (about 34cm/13.5in) around the holder so that the two ends of the strip wrap around the ends and into the space where the wedge shaped piece fits. While holding the cloth strip tightly, insert the wedge and screw down the down to pull the wedge into place. As the wedge is tightened, it will further pull the cloth strip tighter, as well as wedging it in place. DO NOT OVER-TIGHTEN! Remember, the screw is only going into plastic threads; also, only a little tightening will provide good holding strength.
In addition to holding the abrasive cloth strip in place, there is a provision to include "labels" to indicate the grit size of the cloth. This is done by inserting the appropriate "text plugs" into each side of the holder. Text plug files for the numbers 0 - 9 plus a blank are included for this purpose. The plugs are designed so that the numbers can be printed in a different color from the plug base via filament switching (not required, but makes for much better visibility).
Files are provided for two versions of the holder: One with 3 text plug holes, and one with four text plug holes. Both versions include an additional triangular shaped hole which can be used to hang the holders on a pegboard, nail, etc.
The print files for the handing hooks I used are here:
https://www.prusaprinters.org/prints/31724-hooks-for-metal-shelf
Note: Some of the photos show an earlier version of the holder which did not have the triangular hole for hanging, but is otherwise the same.
Note that the files for the knob for this are available here:
https://www.prusaprinters.org/prints/31424-knob-small-8-32-and-m4-70
Assembly
Additional required material :
- screw - either 8-32x1-¾" or M4-70x45mm
First, use a tap to cut threads to match the screw of your choice (inch or metric) in both the Knob and the Body pieces.
Insert the screw into the knob by screwing it in as far as it will go, and then tighten it slightly with a screwdriver - do not over-tighten or you risk stripping the threads.
Next, cut a piece of abrasive strip to a length of about 34cm (13.5"). Insert one end of the strip into the wedge end of the body, and then insert the Wedge piece to hold the strip in place (do not insert the screw yet). Push the wedge in firmly to hold one end of the strip in place, and then wrap the strip around the body (abrasive side outward!), pulling it tightly into place. Hold the already wedged end in place with your finger, and loosen the wedge so that the other end can be inserted into the wedge slot; make sure the strip is tight and then push the wedge in firmly to hold both ends in place. Now insert the knob/screw assembly and screw the knob in to further tighten the wedge - do not over-tighten or you risk stripping the threads. Only mild screw pressure is needed to hold the wedge in place.
Print instructions
Use the 3mf file provided; otherwise:
- Print in PLA
Wedge :
- Print large end down
- perimeters = 4
- infill = 20% rectilinear
Main body :
- Print side down
- perimeters = 4
- infill = 15% rectilinear
Numbers:
- use the 3mf file provided to print in two colors with filament switching
- add or remove numbers as needed
- two of each number required (one for each side of the holder)
- do NOT select "complete individual objects" for two color printing
- infill = 0%
- top/bottom fill = concentric
- perimeters = 4
CAD
The OnShape 3D CAD files for this are available here:
Tags
Model origin
The author marked this model as their own original creation.


